

The next step was to convert one of the splines to the editable poly. then by selecting the created polygon i attached all the splines using attach tool in edit geometry rollout. This transformed all of the splines to single mesh.

All the polygons in the mesh are individual, the polygon vertices are not attached to each other. To fix this I had to select all the vertices and weld them together using weld tool in edit vertices rollout with weld threshold set to 0.1.

Then I had to align the right vertices using tools in edit geometry rollout. Then I switched to see trough mode by pressing alt+x. After this I was able to start giving volume to my model. I switched back to the front and left side viewports and began to select and move vertices from the right side to match the left side of the face. I kept on doing this for long time until all vertices where matching the reference image. Below are couple images of this process.

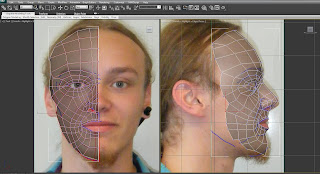
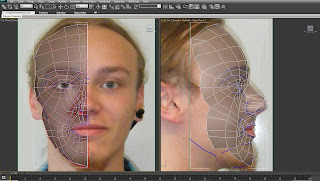
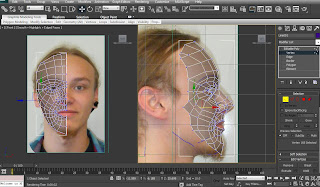
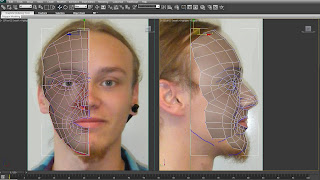


I had found it really hard to figure where each vertex is suppose to be. The most difficult part was eye cause it is not possible to see the inner part of it on reference image. My updated nose topology appeared fine, however after giving a volume it looked very pointy and unrealistic. Therefore, I decided to not follow the nose topology and tried to shape it just from the image to give it more defined volume. I believe there are still space for improvements, but it have taken me a lot of time already, therefore I decided to move on and fix any visible face feature deviations further on.
No comments:
Post a Comment