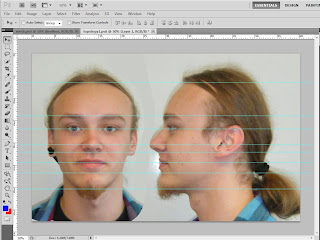
The first task was to follow first three tutorial videos of the organic 3D modelling. Videos were focusing on the preparation stage of the modelling. The pictures of front and side view of the face were taken in the classroom. After that they were opened in Adobe photoshop. Then I had to remove the distortion that was created by the camera. The distortion tool in filters menu was used for this task. Then front and side view images were put together to one file next to each other using selection and copying. The next part was to align the images together so all parts of the face would be in one line. This was done using rulers and transforming and moving the images. The print screen below was taken after all these steps were finished. The one problem was ears which will have to be taken into account during the 3d modelling part. The misplacement is not very visible but ear on the front view image is slightly higher then ear on the side image.

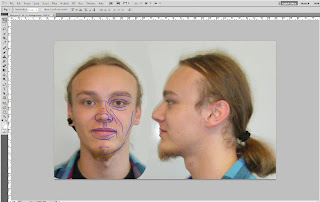
The next step was to create a new layer. It was used to draw a key outlines of the face. Using the brush tool I started to draw lines around my eyes, nose, mouth, chin and cheeks. The marks are supposed to ease the process of creating the mesh. It was quite disturbing as I felt like a plastic surgeon marking my face for the operation. It was not very easy to notice all the features in the face but eventually i got something similar as in the picture from the tutorial.

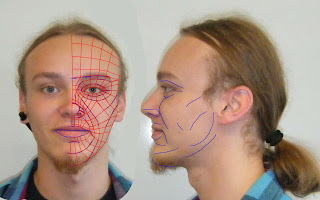
The topology creation starts at this point. It was pointed out that preparing the mesh is vital for the future success of the actual 3D model. The topology was created in new layer using the brush tool. I started around the eye by following key lines. With the topolgy I have tried to recreate the face muscle structure as suggested in the tutorial. From the eye i draw lines trough the cheeks and down to the chin. It took couple of tries erasing and redrawing to ensure the natural flow of the lines. The difficult part was the nose tip which was not finished to the end. Below is the image of my created topology.

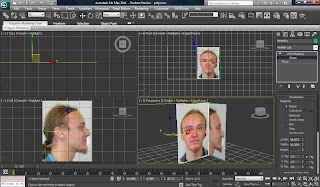
The preparation stage is all finished. Now the final image was exported from Photoshop. Produced image was used for a reference planes. First in 3D studio max I had to create a plane and apply a UVW map modifier. Then I imported the image into the material editor by assigning bitmap material to the diffuse section and importing the image. The image showed up in a low quality and was stretched out. In order to fix the quality issue I had to tick the "match bitmap size as closely as possible" box in the customize/preferences/viewports/configure driver menu. Then in UVW modifier submenu i pressed bitmap fit and selected the same image. This made image on the planes appear in its original size. Then by selecting gizmo from the subtree i managed to center the face part for the front view. For the side view I have copied the already finished front plane and turned it around by 90 degrees. Then again in gizmo mode i moved the image to get the side view of the face.

No comments:
Post a Comment